Thursday, September 1, 2011

Wedding Dress, Before and After

The treatments are finished!  This is the final entry in a 12-part series on selected conservation treatments of artwork and photographs, as well as the final entry of "Preserving a Family Collection."

The subject is brides.

From the start, “Preserving a Family Collection” has been a supplemental blog to the main attraction, June and Art.  The work of preservation is never an end in itself.  Works are preserved in order to help us tell stories, to remember our past, and to continue to appreciate the work of our ancestors.

The story of June and Art culminates today with a bride, a groom, and a wedding.  And these blogs end here today on September 1, 2011, the 60th anniversary of the marriage of June and Art.

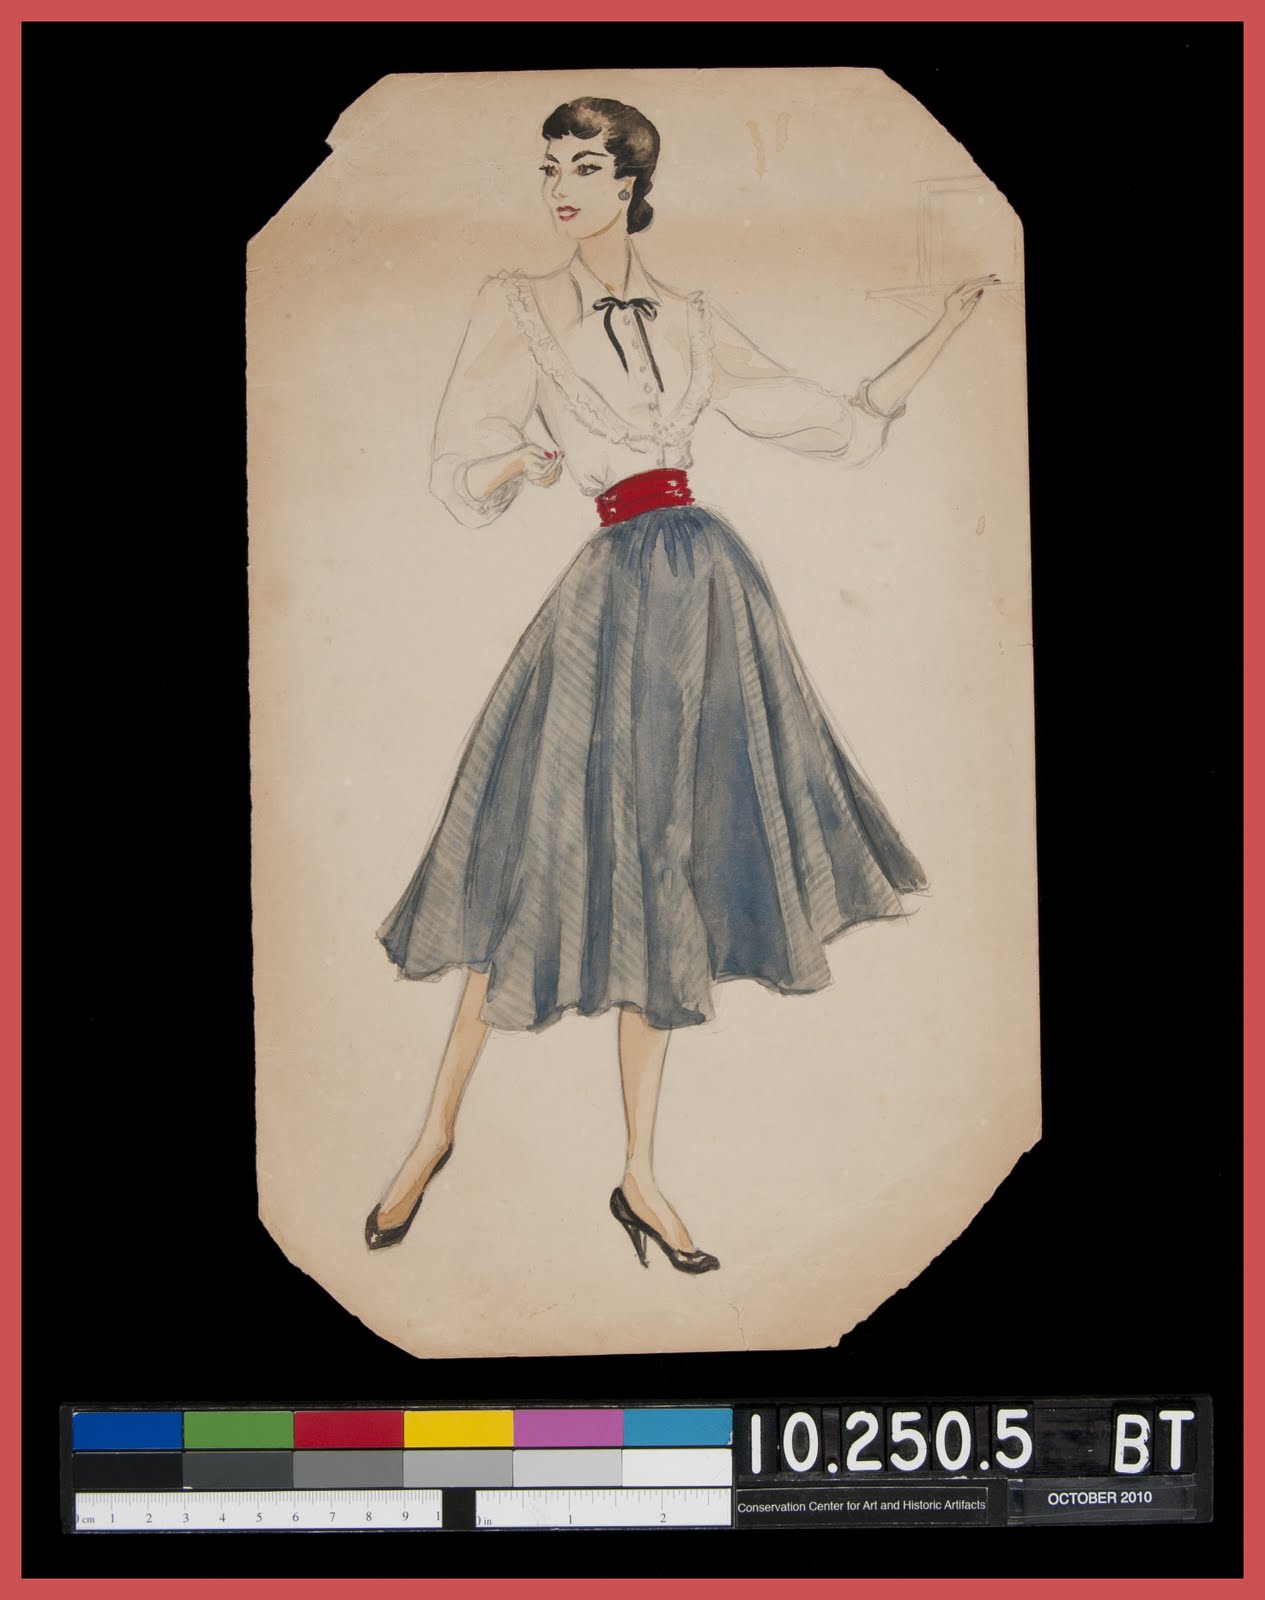
My mother (June) loved brides and weddings.  She drew several fashion illustrations of brides while studying at Traphagen School of Fashion from 1948 to 1950.  Several years ago, I had the watercolor image of two brides cleaned, matted, and framed at the Conservation Center for Art and Historic Artifacts.  This year, I returned to the Center to ask them to treat this smaller pen-and-ink piece.  It had been glued to a backing support  and the image itself was covered by a transparent plastic overlay.

Thank you to Rachel Wetzel, Conservator at the Conservation Center for Art and Historic Artifacts, for her beautiful work conserving this lovely and meaningful item from our family collection!  It provides a very fitting image to conclude this blog and to bid farewell to the story of the courtship of June and Art.

And thank you to the followers and readers of this blog, Preserving a Family Collection.”  Take care of your stories.  And best wishes for your efforts to preserve your family collections.

Wedding dress drawing, before treatment.


Wedding dress drawing, after treatment.

© 2011 Lee Price

Friday, August 26, 2011

Art on Tissue Paper, Before and After

The treatments are finished!  This is the eleventh in a 12-part series on selected conservation treatments of artwork and photographs.  "Preserving a Family Collection" concludes on September 1.

Art on tissue paper by June Anderson.

The art on this tissue paper is particularly fragile and precious.  During their courtship, my father had bugged my mother to show him some of the fashion illustration work she was learning at Traphagen School of Fashion.  She finally responded by sketching a variety of typical fashion poses on a large sheet of tracing paper.  All around the pictures, she jotted her notes with a felt pen.  Then she folded the piece up tightly and mailed it off to Southampton with a letter.

Closeup of Jessica Keister's
treatment.
When I brought the piece into the Conservation Center for Art and Historic Artifacts (CCAHA) for treatment, it was in sad shape.  Problems had probably started right from that first folding to fit it into an envelope.  Thin tissue paper doesn’t fold well, and the tears may have started then.  Sixty years later, there were many tears and deformations along the edges and folds.

Jessica Keister, Mellon Fellow at the Conservation Center, was assigned the treatment.  She noted that her work on this unusual piece happened to coincide with the arrival of some other unusual – yet oddly similar – pieces at the Center.  “We were asked to treat a number of Sailor Jerry sketches.  They posed some remarkably similar challenges.”

Norman “Sailor Jerry” Collins is regarded as one of the great tattoo artists of the past century.  Working from the mid-1940s through the 1960s, Sailor Jerry often used tissue paper to sketch his fanciful stencil designs.  Tissue paper is a little unusual in paper conservation because it doesn’t take well to washing and its transparent nature
                                                               makes it easy to see normal mends.  Therefore, the
Conservator Samantha
Sheesley treating
Sailor Jerry stencils.
conservators adopted new techniques, including the use of an ultra-thin machine-made Japanese paper and an acrylic adhesive.  The result worked well for both Sailor Jerry’s, and my mother’s, artwork.  The mends are barely visible under normal lighting conditions.

I’m delighted with the result – just as the people at Sailor Jerry Limited are pleased with their treatments.  My mother’s treated artwork will go into storage.  The Sailor Jerry work goes on tour, with exhibition stops scheduled at Mystic Seaport (Mystic, CT) and the Columbia River Maritime Museum (Astoria, OR).  You might catch a closer look at the Sailor Jerry stencils at one of those sites, and – as for my mother’s artwork – you can take a closer look here in this June and Art entry.

 
Art on tissue paper by June Anderson, before treatment.

Art on tissue paper by June Anderson, after treatment.

© 2011 Lee Price

Wednesday, August 24, 2011

Two Dresses, Before and After

The treatments are finished!  This is the tenth in a 12-part series on selected conservation treatments of artwork and photographs.  "Preserving a Family Collection" concludes on September 1.

Two dresses fashion illustration by June Anderson.

Foxing visible around perimeter.
The brown spots around the perimeter of this fashion illustration are known as foxing.  It increases in severity as you approach the outer edges of the piece, nearly becoming a uniform brownish tone along the edges.  The fashion illustration itself is one of the nicest pieces that my mother drew while attending Traphagen School of Fashion from 1948 to 1950.  It’s a shame to see it marred in this way.

There are various possible causes of foxing, but Jessica Keister, Mellon Fellow at the Conservation Center for Art and Historic Artifacts, suspects that this particular foxing was the result of early mold growth.  She explained how this can occur:  “First, the piece is stored in a place where the circumstances are favorable for mold growth.  The mold spores start to collect on the paper surface.  But then the environment changes, cutting off the mold before it becomes a serious problem.  Any beginning mold that is present falls over and dies, decomposing directly on the paper.  Foxing like this is often caused by the mold decomposition.”

The good news is that there are no signs of any active mold growth.  The foxing probably took place years – maybe even decades – ago and the piece appears to have remained relatively stable since.

Sometimes conservators are asked to bleach the foxing out, but – while relatively effective – this  strategy also tends to be time-consuming and, therefore, expensive.  Historically important documents and artwork may demand this level of attention, but usually not items from a family collection like mine.  In the case of this illustration, I’ve opted to live with the foxing.

Jessica Keister.
Fortunately, there is a less expensive – but still aesthetically pleasing – solution.  Since the foxing is worse along the sides, matting the piece would hide much of the damage.  It’s a simple and elegant solution.

For this treatment, Jessica split the artwork from the backing board, removing the low-quality acidic filler between the board and the paper.  Then the illustration was washed, humidified, and flattened.  The foxing remains, but it will barely be noticeable after matting and framing.  I hope that ultimately it will go up on a wall in my daughter’s room, alongside some other choice examples of my mother’s work in fashion illustration.


Two dresses fashion illustration by June Anderson,
before treatment.

Two dresses fashion illustration by June Anderson,
after treatment.

© 2011 Lee Price

Monday, August 22, 2011

Quick Sketches, Before and After

The treatments are finished!  This is the ninth in a 12-part series on selected conservation treatments of artwork and photographs.  "Preserving a Family Collection" concludes on September 1.

Surface cleaning a quick sketch by June Anderson.

My mother drew dozens of these quick sketches while attending Traphagen School of Fashion from 1948 to 1950.  Some of them are sloppy but more than a handful are pretty great – on a par with the best of her finished pieces.  My favorite is the one of the woman lying down, chin propped up on fists.  From the start, I’ve thought that some of these sketches deserve to be conserved, matted, framed, and displayed.

Rachel Wetzel, Conservator at the Conservation Center for Art and Historic Artifacts, performed the treatments on these four pieces.  She surface
Rachel Wetzel surface
cleaning a quick sketch.
cleaned them, working cautiously around the graphite artwork, before bathing them in a series of blotter washes, which significantly reduced the discoloration and acidity in the paper support.

Ultimately, I’d like to bring more of these sketches in for conservation treatment.  As with much preservation, I need to view this as a long-term process.  These four sketches are ready to share with the world, the rest I’ll put into long-term (and non-acidic) storage, and then plan to return for additional professional conservation treatments as money becomes available or as an occasional holiday splurge (for instance, a happy-birthday-to-me present).

Rachel endorses this long-term plan and strongly cautions against making any amateur attempts at home conservation treatment.  “Don’t encourage do-it-yourselfers,” she said.  “They can do a lot of damage.” And causing additional damage is the last thing that you want to do when working to preserve a family collection.


First quick sketch, before treatment.


First quick sketch, after treatment.

Second quick sketch, before treatment.

Second quick sketch, after treatment.

Third quick sketch, before treatment.

Third quick sketch, after treatment.

Fourth quick sketch, before treatment.

Fourth quick sketch, after treatment.

© 2011 Lee Price

Friday, August 19, 2011

The Monkey Photograph, Before and After

The treatments are finished!  This is the eighth in a 12-part series on selected conservation treatments of artwork and photographs.  "Preserving a Family Collection" concludes on August 31.


Front of photo, before.


Of all the items we brought in for treatment, I think this tiny photograph may have been in the saddest state of all.  Only slightly larger than a postage stamp, the photo was thoroughly crumpled and a corner had been ripped off, only to be pasted back on by Scotch tape – the bane of conservators everywhere.

Back of photo, after.
Tiny though it is, this picture means a lot to my sister and I because it’s the only physical memento of a favorite family story.  When our father was stationed in Shanghai in 1945/46, he was told that it was his duty as quartermaster to care for the monkey.  Since he had his own room as quartermaster, he was expected to share it with the monkey.  My sister remembers
that he never said anything nice about the monkey – a likely indication that they never became particularly close.  When they sailed from Shanghai, the monkey stayed behind to become the charge of the next quartermaster.

Back of photo, after.
Treating this photo was a two-person job at the Conservation Center for Art and Historic Artifacts.  Rachel Wetzel, Photograph Conservator, used a heated spatula to remove the tape and then got rid of any remaining adhesive residue with a little organic solvent and a crepe square.

Then Barbara Lemmen, Senior Photograph Conservator, received the photograph in two pieces, no longer attached by the tape.  Barb pieced it together with some wheat starch paste, adding a layer of warm and dilute photographic gelatin over the crack to help consolidate it.  She meticulously inpainted the areas of loss, using a stipple technique of little dots that appear
                                                                 as a harmonious tone from a normal
Front of photo, after.
viewing distance. 

It’s a real thrill to recover this picture and now we even have it in two versions.  We have the original, now in better condition than we’ve ever seen it before.  And we have a digitized image by Michelle Dauberman, Manager of Digital Documentation, that enables us to view this 65+ year old picture enlarged and close up on a computer screen – or even to post it on a blog.  Our family’s legendary monkey is fully visible at last!


Art Price with monkey in Shanghai, circa 1945, before treatment.

Art Price with monkey in Shanghai, circa 1945, after treatment.

© 2011 Lee Price

Thursday, August 18, 2011

Minesweepers in Shanghai, Before and After

The treatments are finished!  This is the seventh in a 12-part series on selected conservation treatments of artwork and photographs.  "Preserving a Family Collection" concludes on August 31.


Minesweepers at port in Shanghai, circa 1945.

Charcoal sketch of a
minesweeper by Art Price.
As quartermaster, my father served as the petty officer in charge of day-to-day navigation tasks on several minesweepers during his service in the Navy, 1944-1947.  When he was stationed in Shanghai, his ship was the YMS6, a Yard minesweeper.  You can see it pictured in the photograph above (the ship with the 6 on its bow) and in his own drawing on the right.

The treatment of this magnificent photo of American minesweepers at port in Shanghai, circa 1946, was assigned to Barbara Lemmen, Senior Photograph Conservator at the Conservation Center for Art and Historic Artifacts.  There was a large tear running across the image surface along the far right side, as well as image losses along the top.

Barb mended the tear by working on the back, adding layers of Japanese paper adhered with wheat starch paste.  This was followed by humidification and flattening.

Barb Lemmen inpainting the photo.
The final step is an aesthetic one.  On a project like this, a skilled conservator is sometimes asked to inpaint the losses.  I definitely wanted this.  Inpainting reduces the distracting appearance of the damaged area.  With a talented and experienced inpainter like Barb, inpainting can make the image appear much closer to its original appearance.

First, Barb applied a layer of methylcellulose to the areas of loss – a step that enables her to paint on an inert and water-soluble surface rather than the actual image surface.  When it comes to inpainting, old photos like this require the ability to match very subtle tonal differences.  Black and white photographs often age into muted tones of green, yellow, and brown.  Barb still uses her own favorite watercolor set on most inpainting jobs, skillfully mixing them to get the colors just
                                                                                     right.

“It was against the rules for anyone to go on liberty in Shanghai alone.  I always went with this buddy of mine and usually there were 3 or 4 more of us.  Even then we never went in the old Chinese section or even down a side street at night.  Plenty of sailors, out alone with too much to drink, ended up in the river.”
                                                                                                                                    Art Price

 
Minesweepers in Shanghai photograph, before treatment.


 Minesweepers in Shanghai photograph, after treatment.
© 2011 Lee Price

Tuesday, August 16, 2011

Grandpa on the Lawn, Before and After

The treatments are finished!  This is the sixth in a 12-part series on selected conservation treatments of artwork and photographs.  "Preserving a Family Collection" concludes on August 31.
  
Theodore Carl Anderson, my grandfather, in the
early 1920s.

On the “June and Art” blog, I identified this photo as Theodore Anderson at Brown University in the early 1920s.  In retrospect, I could be wrong – he could just as easily be at home in Deep River, Connecticut or down south in Luray, Virginia, where he met and fell in love with Maud Clem.  Theodore and Maud were my maternal grandparents.

My grandfather mastered the dark room at an early age so it’s a very real possibility that this 8 x 10 enlargement may have been developed by him.  The image itself has held up fairly nicely over the past 80 years.

But I’m betting that he didn’t do the very sloppy framing job.  The print was mounted on a board and then the board was apparently cracked, possibly against the edge of a table, in order to tear it down to frame size.  Pen lines were drawn directly on the image surface to indicate the edges of the mat.  Then a polyvinyl acetate (PVA) white (or school) glue was smeared all over the portions of the image that would be covered by
the mat.  Finally, the mat was adhered directly to the image surface.

Eighty years later, the task of rescuing this poor, mistreated silver gelatin print fell to Barbara Lemmen, Senior Photograph Conservator at the Conservation Center for Art
Barb Lemmen using a heated
spatula to remove mat
fragments.
and Historic Artifacts.  Sometime in its history, the print had been removed from its frame and mat, leaving fragments of mat board and PVA residue along all four sides of the photo.  Barb pointed out that removing PVA can be a challenge since it is not easily softened.  She used a heated spatula to lift off many pieces of the mat board but had to leave some pieces where removal would have meant taking off some of the silver gelatin of the image.

Barb commented that the image itself has changed over time – but not necessarily in a bad way.  Originally, she said, it would have been a crisply detailed black-and-white image.  However, partly because of the acidic board it was mounted on, the colors have deteriorated to these sepia and greenish-yellow tones.  Details have been lost in the face and hands, and Barb ventured that the background has probably lost clarity, as well.  But we both agreed that these changes have added a certain degree of charm, creating an effect as if we are looking at the photo across the mists of time.


Photograph of Theodore Carl Anderson, before treatment.

Photograph of Theodore Carl Anderson, after treatment.

© 2011 Lee Price

Monday, August 15, 2011

A Fashion Illustration, Before and After

The treatments are finished!  This is the fifth in a 12-part series on selected conservation treatments of artwork and photographs.  "Preserving a Family Collection" concludes on September 1.

Fashion illustration by June Anderson receiving surface cleaning with
grated erasers.
As part of its mission the Conservation Center for Art and Historic Artifacts offers opportunities for post-graduate study in paper conservation.  “Post-graduate” is the key term here.  The fellowship program at the Center is for professional conservators, graduates of some of the best programs in the world, at the very beginning of their careers.


Marion Verborg, who performed the conservation treatments described during this past week, is bound for conservation greatness.  She received her Master’s degree in Conservation of Cultural Property, with an emphasis in graphic arts, from Pantheon-Sorbonne University, Paris.  She’s held paper conservation internships at the Philadelphia Museum of Art, the Albertina Museum (Vienna, Austria), the Picasso Foundation (Malaga, Spain) and the Deutsches Historisches Museum (Berlin, Germany).  This month, she concludes her year-long fellowship at the Conservation Center, jets out to an International Association of Book and Paper Conservators conference in Berne, Switzerland to present a paper on light bleaching, then returns to the States to embark on her next fellowship at the Straus Center for Conservation and Technical Studies at the Harvard Art Museums.

And we wish her the best!

A detail of the fashion
illustration.
As she was preparing to leave, I asked Marion which was her favorite of the treatments and this was her choice – one of my mother’s homework assignments from the Traphagen School of Fashion.  “I love this woman in the dress,” she said.  “It’s a lovely fashion illustration.”

For this treatment, Marion surface cleaned the artwork with grated erasers and a soft brush, washed it on blotters, repaired the tears, and finished with humidification and flattening.  She did beautiful work.  Harvard’s lucky to get her!


Fashion illustration by June Anderson, before treatment.

Fashion illustration by June Anderson, after treatment.

© 2011 Lee Price

Friday, August 12, 2011

Drawing of a Dog, Before and After

The treatments are finished!  This is the fourth in a 12-part series on selected conservation treatments of artwork and photographs.  "Preserving a Family Collection" concludes on August 31.

I love this photo of a treatment in progress.  I call it “Washing the Dog.”


This dog – and another dog that my father painted – were just neighborhood dogs.  My father didn’t grow up with a pet dog of his own and didn’t own one until he was in his forties, when our family brought home a Saint Bernard puppy.

As a dog enthusiast, I like this picture a lot.  It captures a certain doggie dignity that’s very appealing. 

Or maybe he’s just begging...

Marion Verborg, 2010-2011 N.E.A. Fellow at the Conservation Center for Art and Historic Artifacts, treated this pencil drawing.  She surface cleaned it, washed it in calcium-enriched deionized water, mended some tears and losses with Japanese paper, and humidified and flattened it.

Note the three dark areas along the right edge of the paper in that “Washing the Dog” picture.  These areas surrounded small holes that were torn into the paper in order to place it into a three-ring binder.  Following the bath and Marion’s mends to the back of the paper with Japanese paper, the old damage to the paper is barely visible at all.


Drawing of a dog by Art Price, before treatment.

Drawing of a dog by Art Price, after treatment.

© 2011 Lee Price

Wednesday, August 10, 2011

The Card Game, Before and After

The treatments are finished!  This is the third in a 12-part series on selected conservation treatments of artwork and photographs.  "Preserving a Family Collection" concludes on August 31.

The Fight by Art Price.


My father witnessed
a fight aboard ship
while serving in the
Navy (1944-1947). 


He attempted
to capture
it twice,
first in this
monochrome version:


And later
in color:

The Fight by Art Price.

Marion Verborg, 2010-2011 N.E.A. Fellow at the Conservation Center for Art and Historic Artifacts, treated the first version, a study done with washes of transparent black watercolor and opaque white gouache.  This one needed lots of care.  The paper was torn in several places and area along the top edge was severely weakened by
Back of paper, before treatment.
creases.  Marion worked to flatten the upper areas of the paper by applications of ethanol and weights, as well as to strengthen it with many strips of Japanese paper* applied to the paper with wheat starch paste.  A final episode of humidification and flattening returned the artwork to good form at last.

Back of paper, after treatment.
From the front, the difference isn’t that visible (it’s much more apparent from the back) but the strengthened paper should significantly contribute to the long-term preservation of the piece.

* Usually made of kozo fibers, Japanese paper is known for its extremely long fibers that are both flexible and strong, making it ideal for a conservator to use for mending losses and tears.


The Fight by Art Price, before treatment.

The Fight by Art Price, after treatment.

© 2011 Lee Price